this page is under construction
This post is designed to assist in exporting files from CURA for use on the ALDI Cocoon 3D printer. The settings will cover the differences in exporting for use with the PLA and ABS filaments. In particular the Glow in the dark filament.
CLICK HERE To seeing how to setup CURA for use with the cocoon 3d printer
Setup for PLA
This is the easier of the two filaments to work with.
Set your printing temperature to 215'c and the bed temperature to 50'c
You may find that you do not even need to set a raft for this filament tho it is recommended.
 |
| ABOVE: settings to change to use PLA filament |
 |
| ABOVE: green PLA filament with raft |
Setup for ABS
The following will cover setup and usage of the glow in the dark filament.
STEP 1: setting up CURA
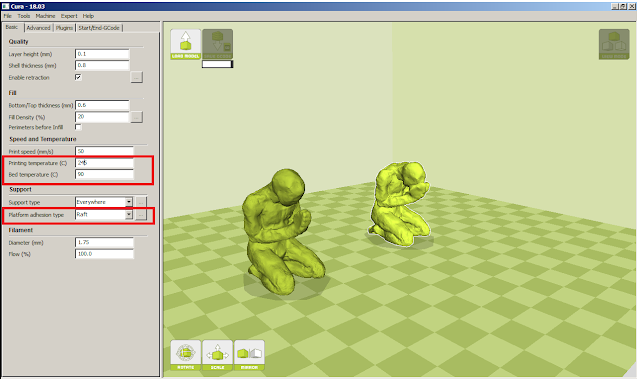
Set printing temperature to 245'c
set bed temperature to 90'c ( the recommendation is to set it to 100'c, but this temperature will evaporate the bonding liquid)
set platform type to raft ( you MUST use a raft with ABS filament to reduce failure rate )
For these prints a layer height of 0.2 was used. This greatly increases print time (almost 50% less) but be aware this this will give the form a textured, almost shimmery surface, which supports my conceptual focus. It is personal choice but for most applications I would recommend using the default Layer height of 0.1mm for the greatest level of detail and minimal unintended texture.

STEP 2: Prepare the bed of the 3d printer.
The printer bed must be completely clean, then apply a liberal layer of Bostik glue to the entire surface. This will aid the raft of your form to adhere to the surface of the print bed and reduce failure rate.
If you use UHU glue you will find that within half an hour of printing it may turn into a white powder, causing the raft to breakfree of the print bed surface.
 |
| Use Bostik, avoid UHU due to increased failure rate |
 |
| A successful double print using Bostik as the adhesive agent. |
 |
| ABOVE: successful print of 11 figures taking 8 hours. There are some imperfections but is an overall successful print |
No comments:
Post a Comment