Wednesday, 17 August 2016

HOW TO : install/setup the ALDI cocoon 3d printer for Cura (windows 7)


How to install/setup the ALDI cocoon 3d printer for Cura (windows 7)


Step 1: Visit the cocoon website and click the download link on the main page https://www.cocooncreate.com.au/download/


Step 2 : On this page you will be downloading the CURA software and the configuration file for the printer which is needed for CURA to work with the cocoon printer.
Go ahead and download the CURA software, but do not install it yet.


Step 3:Now we need to download the configuration file. If you click on the here link it will just open it as a readable file. You need to right click and save linked contend as... from the drop down menu (pictured below)


Step 4: Make sure that you know where you are saving this file as you will need to move it very soon into the CURA install folder. Also note that you need to make sure that it is saved as a Configuration Settings or .ini file.


Step 5: Now its time to install the CURA software. Double click the CURA installation file that you downloaded off the cocoon website which should be titled Cura_18.03.exe or redownload here.
Make sure you pay attention to where it is being installed as you will need to open this folder to copy the configuration file once it is installed. When you see the install window (below) click next (leave the destination folder as it is below)
Now just wait for it to finish installing then move onto the next step.


Step 6: Once CURA has installed make sure that you DO NOT run the software, First you need to copy the configuration file into the installed folder. Find the directory circled below. 
Local drive (C:) --> Program files(x86) --> Cura_10.03 --> Resources --> machine_profiles
(Note that the directory may be different depending on your operating system. )
You will need to copy the printer profile you downloaded earlier into this folder. The file should be titled Cura Profile Cocoon HE150272 - 3D printer and be a configuration settings file type.


Step 7: Open the CURA program. If you are running CURA for the first time, you will be greeted with this image. Select Other Printers and press the Next button.
If you already opened the CURA program and are not greeted with this screen go to Step 11. Otherwise just continue,


Step 8: Now select Other(Ex:RepRap, MakerBot, Witbox  and press the Next button


Step 9: Now select Cura Profile Cocoon HE 150272 - 3D printer from the list and press the Next button


Step 10: You are now ready to start importing and exporting models for the cocoon 3D printer


Step 11: This step is for people who have already opened the CURA software and need to add the cocoon printer to CURA 
Just click the tab Machine  then click add new machine... this will bring you to step 7


Sunday, 7 August 2016

HOW TO: use the ALDI 3D printer


Which printer is it ? 

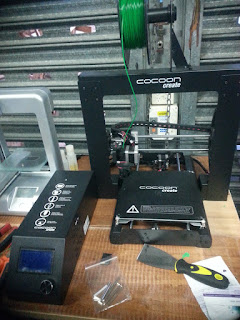
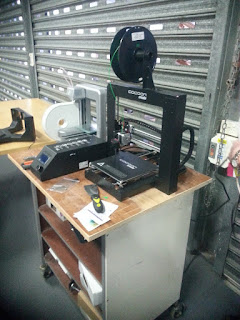
The Cocoon Create 3D printer, sold at ALDI stores(australia)  feburary 2016
printer value $500


How to Setup the 3D printer


Sadly due to the low pricepoint alot of manual setting up is requred.
Navigating the menues is done through the LCD using a dial. To make a selection in the menu push the dial inward.

Threading the line
The threading of line into this machine is a manual process, which can be difficult as the gaps in the head allow the line to thread out the back. You will need to turn on the machine and use the LCD interface to select the line feeder and prehead the print head and slowing turn the knob to feed the line through.
Each time you need to re-thread the line into the print head you should make sure the head is cleared.
To do this undo the lower screws of the left hand fan and carefully remove the heat sink which will expose the print head.. Push anything that is blocking the print head through while the print head is in preheat mode (215'c). Once clear now reassemble the print head.

Calibrate the print bed
This model does not auto calibrate. You will need to tighten or loosen the springs located at the four corners of the print bed.

  1. Using the LCD screen select calibrate XY. Which will bring the print bed to the bottom left hand corner.
  2. You can now tighten and loosen the screws/springs using an alan key. To test the tightness of the bed put a piece of paper between the print head and the bed. The paper should be gripped enough that it can be pulled out easily but not enough that pulls straight out.
  3. This process needs to be repeated at all four corners of the print bed. 


NOTE: that if you move the printer you will need to recalibrate all of the above

How to Print an object 


This is the easy part, Insert the MICRO SD card supplied with the printer, and using the LCD screen select card --> then the file you wish to print. The file will need to be an STL(STereoLithography) .
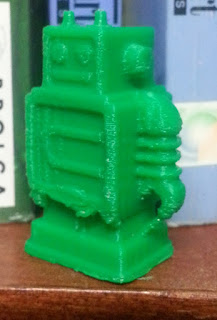
The printing time will vary depending on the size of the object to be printed. The robot took approx 30mins and is 3.5cm tall. Larger objects can take 14hours or more depending on complexity and mass.

NOTE: the quality of the printing isnt perfect, it is a cheap printer after all


Tuesday, 2 August 2016

ARTIST RESEARCH Tim Noble and Sue Webster


Tim Noble and Sue Webster take ordinary things including rubbish, and use it to create art. Usually they focus on creating projection images of self portraits. This particular pile of garbage took 6 months for them to collect, if you look at the shadow in the background it creates is two people sitting back to back drinking and smoking.

source:http://iliketowastemytime.com/amazing-silhouette-art-made-out-of-trash